Spring Cloud Config란
Updated:
Spring Cloud Config가 왜 필요할까?
Spring Cloud Config를 사용하지 않는 Spring boot 애플리케이션에서는 설정파일들을 어떻게 관리할까? 기존에는 하나의 프로젝트 파일에 application-local, application-dev, application-prod.yml 등 버전별로 yaml파일을 생성하여 프로젝트 설정을 관리했다. 그래서 설정 변경이 필요해 yaml 파일을 변경하면 그 애플리케이션을 다시 빌드하고 배포하는 과정도 필수였다. 또한 MSA와 같이 분산 환경에서 그러한 구조는 매우 불편하고 비효율적인 방식일 것이다.
Spring Cloud Config는 이러한 방식을 개선하여, 분산된 환경에서 설정 파일을 외부로 분리해주고 모든 버전 별 환경 구성을 매우 효율적으로 관리할 수 있게 해준다.
그럼 Spring Cloud Config는 무엇이고 어떤 방식으로 동작할까?
Spring Cloud Config란
Spring Cloud Config는 환경 구성을 애플리케이션과 분리된 외부에 두어, 애플리케이션의 빌드와 배포 없이 환경 설정 변경을 적용할 수 있게 해준다. Spring Cloud Config는 Spring Cloud Config Server와 Config Repository로 구성되어있는데 Spring Cloud Config Server는 모든 환경 설정의 정보를 관리할 수 있도록 외부화된 환경 설정 서버, Config Repository는 모든 환경 설정 파일을 저장하고 있는 저장소이다. Config Repository는 Git으로 관리된다.
Spring Cloud Config의 동작 방식
먼저, 애플리케이션이 실행되면서 환경 설정 정보를 가져오기위해 Config Server에 접근한다. Config Server는 Config Repository에서 가장 최신 버전의 해당 애플리케이션의 환경 설정 정보를 가져와 애플리케이션에 전달한다.
만약 설정파일을 변경하고 싶다면?
설정 파일을 변경한 후 Config Repository에 업데이트한 뒤, 애플리케이션에 actuator/refresh를 POST호출하면 업데이트된 설정 값이 적용된다.
Spring Cloud Config Server구축하기
그럼, Spring Cloud Config Server를 구축해보자.
- Config Repository에 yaml파일을 생성한다.
- config-example-dev.yaml
example: phase: "default" - config-example-prod.yaml
 example:
 phase: "prod"
- config-example-dev.yaml
-
Config Server 만들기
- pom.xml에 아래 dependency를 추가한다.
<dependencies> <dependency> <groupId>org.springframework.cloud</groupId> <artifactId>spring-cloud-config-server</artifactId> </dependency> <dependency> <groupId>org.springframework.boot</groupId> <artifactId>spring-boot-actuator</artifactId> </dependency> </dependencies> - ConfigServiceApplication의 Main Class에 @EnableConfigServer를 추가한다.
package com.sk.mis.config.service.boot; @Slf4j @EnableCaching @SpringBootApplication @EnableConfigServer public class ConfigServiceApplication { public static void main(String args[]) { SpringApplication.run(ConfigServiceApplication.class, args); } } - ConfigServerApplication의 application-dev.yml에 앞서 생성한 Config Repository의 주소를 적는다.
 cloud:
   config:
     server:
       git:
         uri: http://config repository 주소
- pom.xml에 아래 dependency를 추가한다.
-
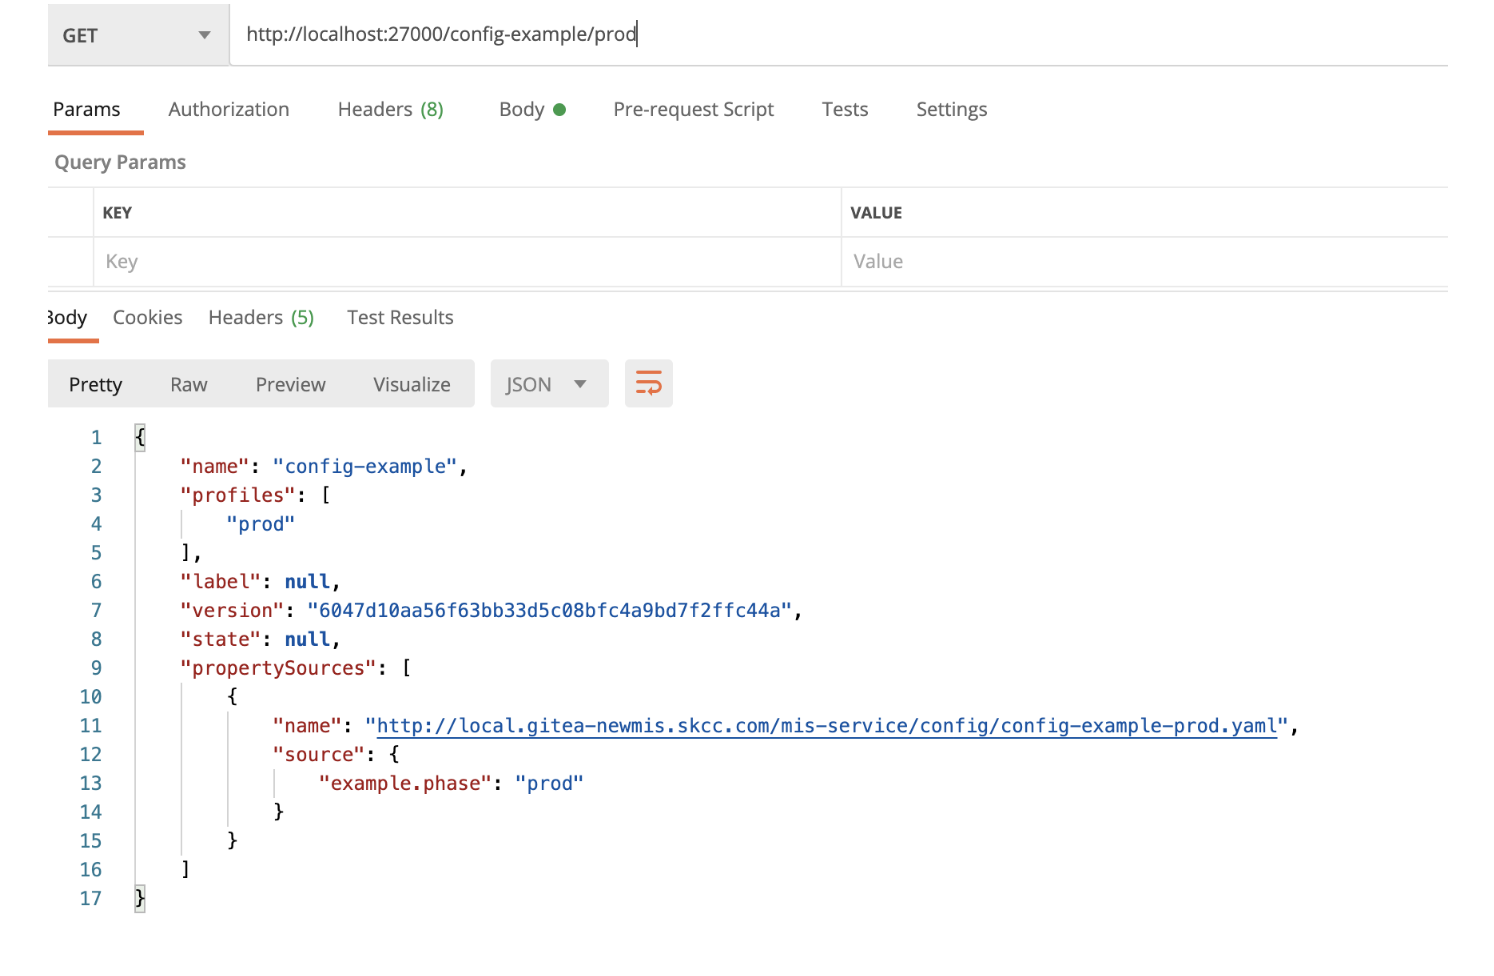
애플리케이션을 실행해보자. 애플리케이션을 실행하고 config repository에 있는 설정을 잘 가져오는지 확인해보기 위해 아래와 같이 포스트맨으로 요청을 날렸다. 먼저, dev 설정을 가져와본다.

두번째로 prod설정이다.

여기까지 Spring Cloud Config Server를 구축하고 실제로 환경 설정 정보를 잘 가져오는지도 확인해보았다.
Spring Cloud Config Client 구축하기
Spring Cloud Config Client는 일반 Spring Boot Application 설정에 아래만 추가해주면 끝이다.
- pom.xml에 dependency 추가
<dependencies> <dependency> <groupId>org.springframework.boot</groupId> <artifactId>spring-boot-starter-actuator</artifactId> </dependency> <dependency> <groupId>org.springframework.boot</groupId> <artifactId>spring-boot-starter-web</artifactId> </dependency> <dependency> <groupId>org.springframework.cloud</groupId> <artifactId>spring-cloud-starter-config</artifactId> </dependency> </dependencies> - Config 서버를 바라보도록 설정
application.yml보다 먼저 로드되는 bootstrap.yml에 작성하였다.
server: port: 8089 spring: profiles: # 여기에 지정해도 되고, 실행할 때 지정해도 된다. active: dev application: name: config cloud: config: uri: http://localhost:8088 management: endpoints: web: exposure: include: refresh -
@RefreshScope를 추가하여
actuator/refresh호출 시 서비스가 실행되도록한다.RefreshScope 어노테이션을 붙이지 않으면
actuator/refresh를 호출하여도 아무것도 실행되지 않고 당연히 변경사항도 받아올 수 없다. 따라서, 반드시 붙이도록 한다!또한 무슨이유에서인지 @RefreshScope를 붙여도 실행되지 않는 경우가 있었는데, @EventListener를 추가하여 해결하였다.
 @Service
 @RefreshScope
 public class DynamicConfigService {

 ...중략 ...

  @EventListener(RefreshScopeRefreshedEvent.class)
  public void onRefresh() {
      log.debug("Refreshed");
     }
 }
마치며
Service Mesh가 핫한 요즘, Spring Cloud Config가 조금은 식상해보일 수는 있겠지만 Spring Boot Application을 개발하고 있고 Cloud Infra에 익숙하지 않은 개발자, 그리고 Spring Cloud와 같이 Spring Boot로 개발하는 것이 더 친숙하고 익숙한 개발자에게는 좋은 서비스라고 생각한다. 물론 Service Mesh의 Config Map을 활용하는 것이 결과적으론 더 좋을 것 같긴하다. Spring Cloud Config는 Spring Boot에만 사용할 수 있다는 제약이 존재하니 말이다.
추가로 Spring Cloud Config Bus라는 것도 있는데, Spring Cloud Config와 다르게 설정파일을 변경하고 push 하면 actuator/refresh를 호출해줄 필요없이 자동으로 애플리케이션들에게 변경된 설정 내용을 전파해준다고 하니 참고하면 좋겠다.
